I get a lot of questions about the supplies I use. Here’s a list of my go-to supplies. These are the ones I use every day, most of them for years! I only recommend items that I would purchase myself.
Full disclosure: I do use affiliate links in my website. When you use these links to purchase items, I get a small commission at no extra cost to you. It does help with administrative costs for my blog and I sincerely appreciate when you use them!
Die Cutting Machines & Accessories
- Anna Griffin Empress – The only electronic die cutter I use. Works with thin dies, plates, embossing folders (including the thick ones), etc. The sandwich comes with a magnet plate that works really well. I like that the plates can be fed in portrait or landscape. Pros: Sturdy, smaller footprint compared to other full-sized machines, plates do not warp, very quiet / Cons: Expensive
- Spellbinders Platinum 6 – My most used manual machine. Works with thin and thick dies, plates, etc. Comes with a thick base plate. Pros: sturdy, folds up when not in use, plates don’t warp because of thick base plate, works with Glimmer machine / Cons: manual machine may not be great for those with physical issues
- Big Shot – My backup manual machine. Pros: sturdy, plates don’t warp because of thick base plate / Cons: heavy, takes up a lot of space, manual machine may not be great for those with physical issues
- Magic Mat – Self-healing mat similar to cutting mats for rotary cutters. I use this with my Big Shot and have good results.

Foil Machine & Accessories
- Spellbinders Glimmer Machine – My only hot foiling machine that uses plates. Uses plates from most companies. Works with Spellbinders Platinum 6 die cutter (preferred), but can work with Big Shot as well. The system is an investment, but the “wow” factor of foil is hard to resist or duplicate with other methods. Pros: foils well / Cons: expensive, takes practice to perfect technique
- Waffle Flower Solid Foil Plate – Solid foil plate for reverse foiling. Larger 5X6 size. Click here to buy on Waffle Flower site. Pros: large size, sturdy plate; Cons: takes practice to perfect technique
- Foils – I use only Spellbinders foils with my Glimmer machine. For my Minc machine, I use a variety of foils that work with toner images.
- Heidi Swapp Minc Foil Machine – This hot foil machine uses toner-reactive images to apply foil. It cannot be used with foil plates. This works great with digital designs that are printed out with a toner ink-based laser printer (not inkjet) or commercially-available designs that work with toner ink-reactive foil.

Grip Mats, Craft Mats, & Stamping Platforms
- Waffle Flower Grip Mats – These grip mats are made from clear photopolymer just like clear stamps and have a natural stickiness that holds paper and stencils without adhesives. I use mine for stenciling and inside my Misti stamping platform. Click here to buy on Waffle Flower site.
- Waffle Flower Silicone Mats – Multiple versions available from Waffle Flower. Cleans up well and is great for stamping, blending, painting, and embossing (heat resistant). The only warning, no sharp tools. Click here to buy on Waffle Flower site.
- Tim Holtz Glass Media Mat – Sturdy tempered glass mat that is more resistant to sharp items. Just a warning that it can still scratch. Great for stamping, blending, and painting.
- Misti Stamping Platform – Stamp positioner platform that lets you stamp multiple times for perfect coverage. Comes in different sizes. I use mine with a Scrapbook.com sticky mat or the Brutus Monroe Sticky Mat to hold my paper in place instead of the magnets.

Ink Blender Tools & Accessories
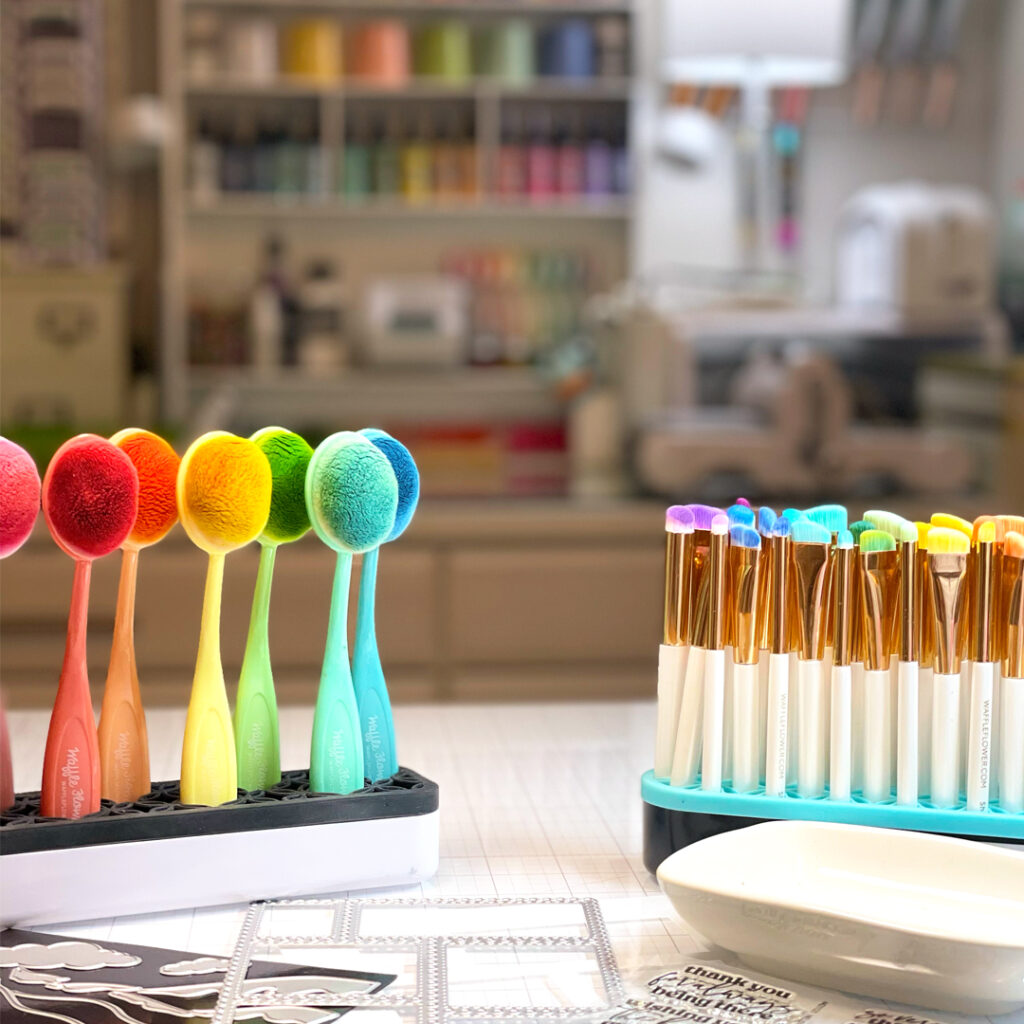
- Waffle Flower Blending Brushes – I use blending brushes when I want to build up layers softly. I like the Waffle Flower ones the most because they work great and look beautiful (love the pastel colors). Click here to buy on Waffle Flower.
- Waffle Flower Small Blending Brushes – I use these small blender brushes for almost all my cards with ink blending. They come in 4 different sizes (2 round and 2 oval). Perfect for multicolor stencils and highlighting. Click here to buy on Waffle Flower.
- Ranger Mini Foam Blending Tool – I still use my trusty foam blenders for when I want to lay down heavy color. I use the original Ranger/Tim Holtz type.
- Pump Dispensers – These dispensers easily pump liquid onto a wipe or towel with one hand. I have a large one filled just with water and a smaller one (pink one) filled with stamp cleaner. Makes cleaning up stamps and work surfaces quick and easy. Click here to buy big dispensers or small dispensers on Amazon.
- Brush Holder – My favorite holder for my brushes is a silicone brush holder. They hold all different sizes and can easily be moved around. They can be found from many sources, but my favorite are these from Amazon because of the size and how soft the silicone parts are (makes it easy to remove brushes with one hand). Click here to buy a set of two holders on Amazon.
- Stencil Binder Organizer – To keep my stencils organized and easy to find, I use a storage binder with clear sleeves. These binders are great because the pages can be rearranged and they are a great size for A2 and 6″X6″ stencils. Click here to buy them on Amazon.

Craftroom Storage
- Project Boxes – These sturdy boxes fit up to 5X7 stamp sets and stencils. I use them when I’m doing DT work. Each box can fix all the products from the release. The measure 7″ wide X 9″ high X 2″ thick. Click here to buy on Amazon.
- Large Adjustable Lazy Susan – I use this on my main crafting table. It is very sturdy and can be adjusted to accommodate taller items on the bottom shelf. Click here to buy on Amazon.
- Stencil Binder – These binders are made for baking stencils but they work great for papercrafting stencils too. They fit most of my stencils except the very largest ones. Click here to buy on Amazon.
- Embellishment & Sentiment Strip Storage Book – These books are made for photos but the sleeves work great for small flat embellishment packs or sentiment strip packs. Click here to buy on Amazon.

Basic Inks
- Versafine Clair (Sentiments) – Absolute best for stamping sentiments. Crisp, very black, and done in one stamp. The regular Versafine ink pads work well too, but the Clair is slightly more crisp and dries quicker. I also use the gray and brown versions for sentiments.
- Versamark (Embossing) – The Versamark embossing pads are the community standard for a reason. I’ve had mine for ages and it still works amazingly well.
- Tsusineko Memento Tuxedo Black – Still the standard for stamping images that you want to color with Copics/Alcohol markers.

Cardstock & Paper
- Papertrey Ink (White & Colors) – I’m very picky about paper and I have always used Papertrey Ink Stampers Select White since I started cardmaking (over 10 years ago). It is very white (no tint of blue, pink, gray, or yellow) and is heavy (index 110 lb). The colored cardstocks are the same heavy weight as the white and come in the best variety of colors I have seen, including some exclusive colors that aren’t available anywhere else in this weight.
- Hammermill Cardstock, Premium Color Copy, 100 lb – This is what I use for foiling. Foiling works best with super smooth paper and this is it! It is not as thick or sturdy as the Papertrey Ink paper, but it not lightweight. Available on Amazon here.
- Arches Watercolor Paper (Watercolor Painting) – My favorite watercolor paper is Arches, but that’s just for watercoloring. It’s pricey and I usually reserve it for actual watercoloring and not cards.
- Master’s Touch (Cards) – For cards, I have actually been using Master’s Touch from Hobby Lobby. It has a texture to it that I like. You may not like the texture, but I think the texture lends itself to the handmade look of watercoloring. Just a caveat, this paper may not be the best paper for creating full watercolored pieces, but it’s great for cards.
Adhesives
- Bearly Arts (General Liquid) – This glue is the best all-around glue especially for small die cuts and embellishments. Liquid glue is also best when you need a little time to move the pieces before the glue sets.
- Waffle Flower Foam Strips (1/8″ & 1/16″ thickness) – For ease of use, the foam strip sheets from Waffle Flower are the best. They also have a really nice double-sided adhesive sheet that works awesome for die cuts. Available in 1/8″ foam strips or 1/16″ foam strips from the Waffle Flower site.
- 3M Foam Tape – I tried to go with the cheap foam tape rolls but most of them had terrible adhesive or were very squishy.

Markers
- Copic (Alcohol Markers) – There are a lot of new options for alcohol markers, but Copics are still the standard for their large range of colors and the fact that they can be maintained (change nib and refill with ink). It’s definitely an investment, but the color blending is the easiest and looks the best compared to others I’ve tried.
- Sakura Gelly Roll (White Gel Pen) – Sakura Gelly Roll White Gel Pens are still my favorite. They have good opaqueness and don’t seem to dry out or gum up like others I’ve tried.
Miscellaneous Tools & Supplies
- Detail Scissors – My favorite small, detail scissors are from Cutter Bee. They are very light and thin at the tip. Great for fussy cutting and detailed cutting.
- Silicone Tape – I use this tape to help me secure things around the craftroom. It is made of a sticky silicone that is very sticky but still removable from non-porous surfaces. Click here to buy on Amazon.
- Spool Covers – These are usually used to keep spools of thread from unraveling. I use them for thread, spools of twine, and rolls of foil. Click here to buy on Amazon.
- Pump Dispensers – These dispensers easily pump liquid onto a wipe or towel with one hand. I have a large one filled just with water and a smaller one (pink one) filled with stamp cleaner. Makes cleaning up stamps and work surfaces quick and easy.
- Teflon Bone Folder – I really thought that people were exaggerating about needing a teflon bone folder, but it really does work! It doesn’t tear at your paper and gives a smooth edge.
- Pixie Spray (Stencil Spray) – This repositional adhesive spray is what you need for stencils. Sticky but not too sticky. It’s very light too, so your stencils don’t get all gummy.
- Splatter Tool – If you want to achieve that perfectly imperfect splatter, get one of these from Tim Holtz or Liquitex. I have used paintbrushes and toothbrushes, but I like these tools because they seem to give natural looking splatters.

What about other stuff?
- Glue guns/tape runners – I do use them, but I don’t have a favorite. They are all very similar and there are so many sizes/shapes out there. Pick what works for you. Pay attention to permanent vs. repositional.
- Paper trimmers – I have a guillotine trimmer, but I know many folks do not like to have a blade cutter. There is a wide variety of opinions on cutters, but you can expect to pay more if you want one to last a long time. I prefer a larger size (12X12) because I want the option to cut scrapbook paper.
- Scoreboards – I have a number of scoreboards and they all work about the same. Just think about the size of your cards/projects before you choose. You’ll want a larger one for party favors and slimline cards.
- Scissors – Lots of choices out there now. You do need a large pair and a detail pair. Just remember to keep your paper and fabric scissor separate.